Essential Steps for a Successful WordPress Site Migration. Best Practices and Precautionary Measures
While the prospect of migrating a WordPress site can be overwhelming, it is achievable if you follow the correct procedures. If you possess a certain level of technical proficiency, it is possible to transfer your content to a new hosting provider or domain name without relying on third-party tools or Plugins.
Prior you move your site to a new host, it is crucial to undertake certain precautionary measures. Firstly, eliminate any inactive WordPress plugins and themes to avoid transferring unnecessary content. Additionally, ensure that your WordPress site, themes, and plugins are fully updated. Also, please be sure your new host is perfectly set up. It is advisable to disable any caching plugins that may be installed on your original site, as they can occasionally disrupt the migration process. Lastly, it is highly recommended to create a backup of your website before WordPress site migration. This precautionary step will guarantee the availability of a functional copy of your site in case any issues arise during the manual migration.
This comprehensive guide will walk you through the step-by-step process to manually migrate a WordPress website rather than using some third-party plugin.
1. Set Up The New WordPress Hosting Where You Are Going To Migrate Your WordPress Site
Get a new hosting account which if managed one then it will be all set by hosting provider themselves.
2. Copy the WordPress files from your old server
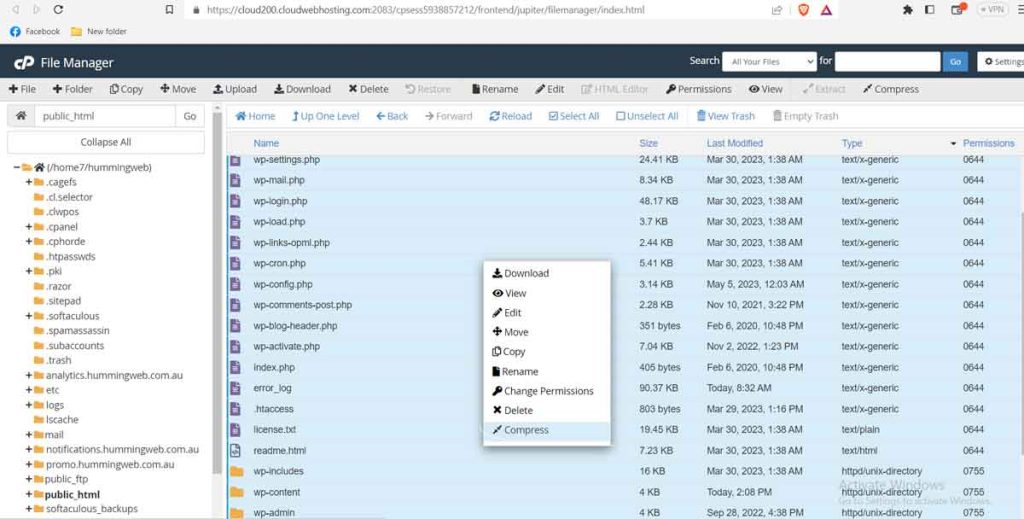
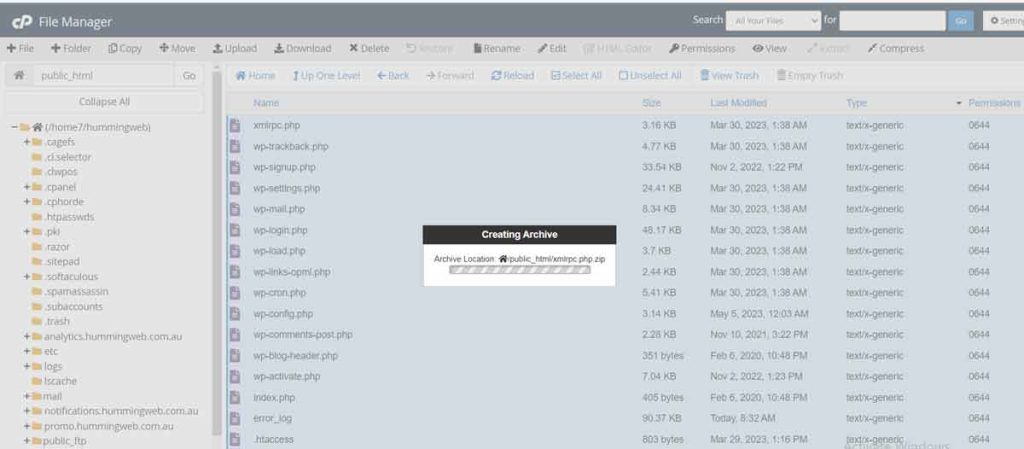
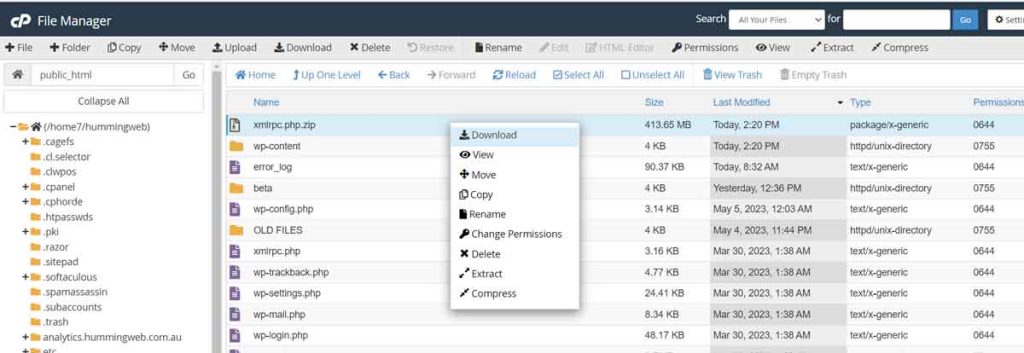
Connect to your current server via FTP or use the file manager in your hosting control panel. Locate the WordPress installation directory, usually in the “public_html” folder, and download all the files to your local computer. Using File editor in your hosting Cpanel will be easier. Please select all files and compress them in zip format and then download the file.
3. Export the database for complete WordPress migration
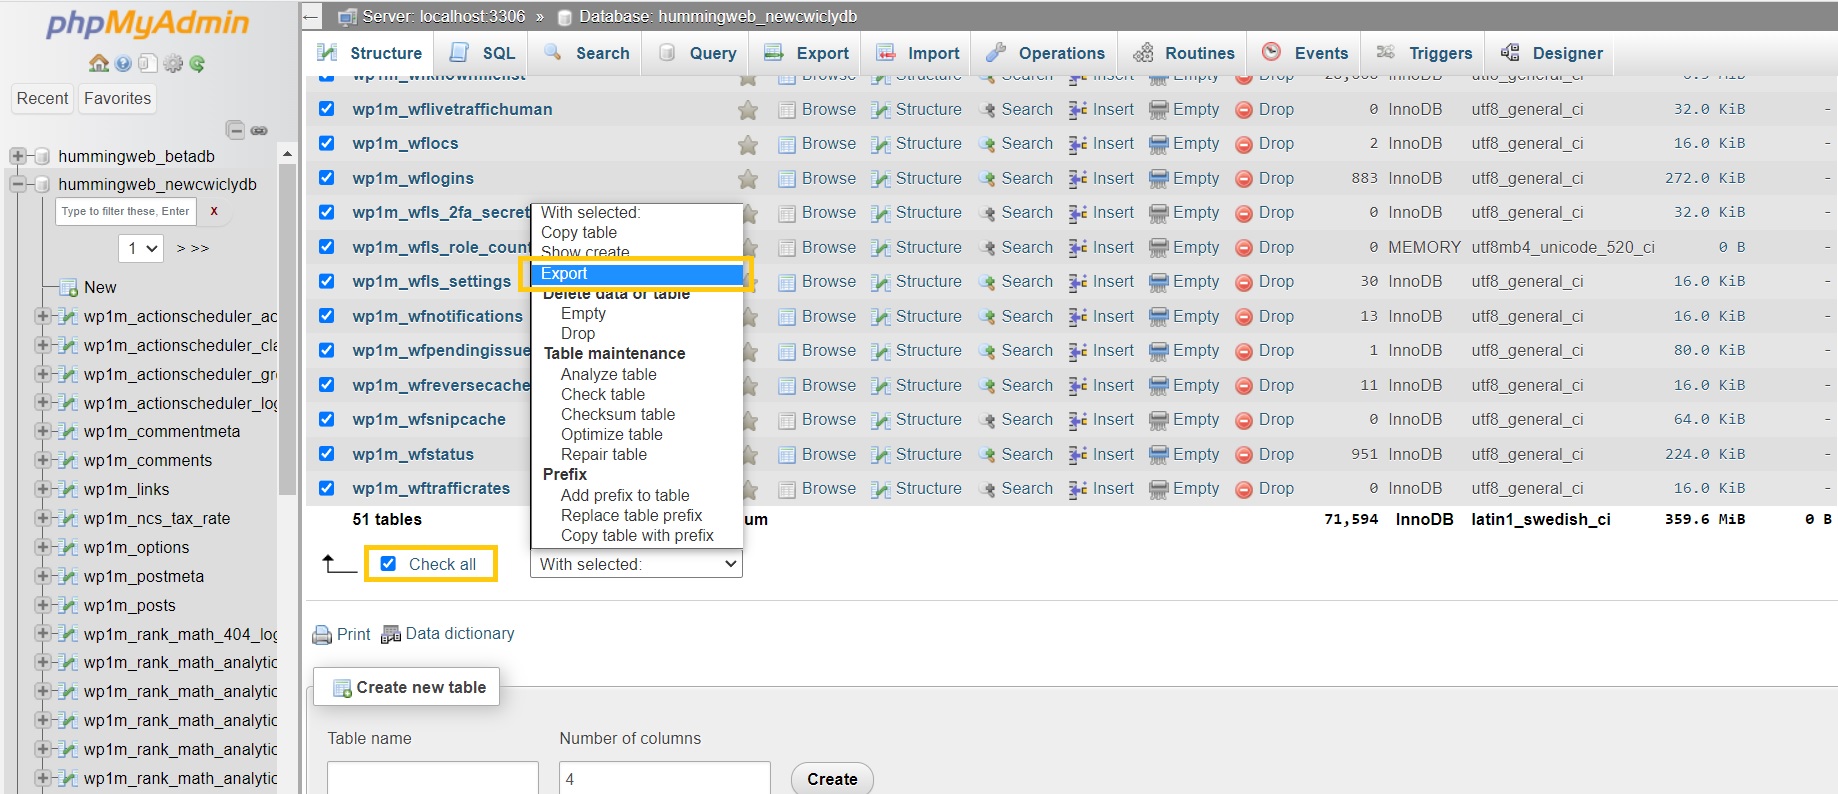
Access your current WordPress site database through phpMyAdmin or a similar tool provided by your hosting provider. Select the WordPress database and choose the “Export” option. Ensure you select the option to export the entire database structure and data. Before exporting please select all the tables.

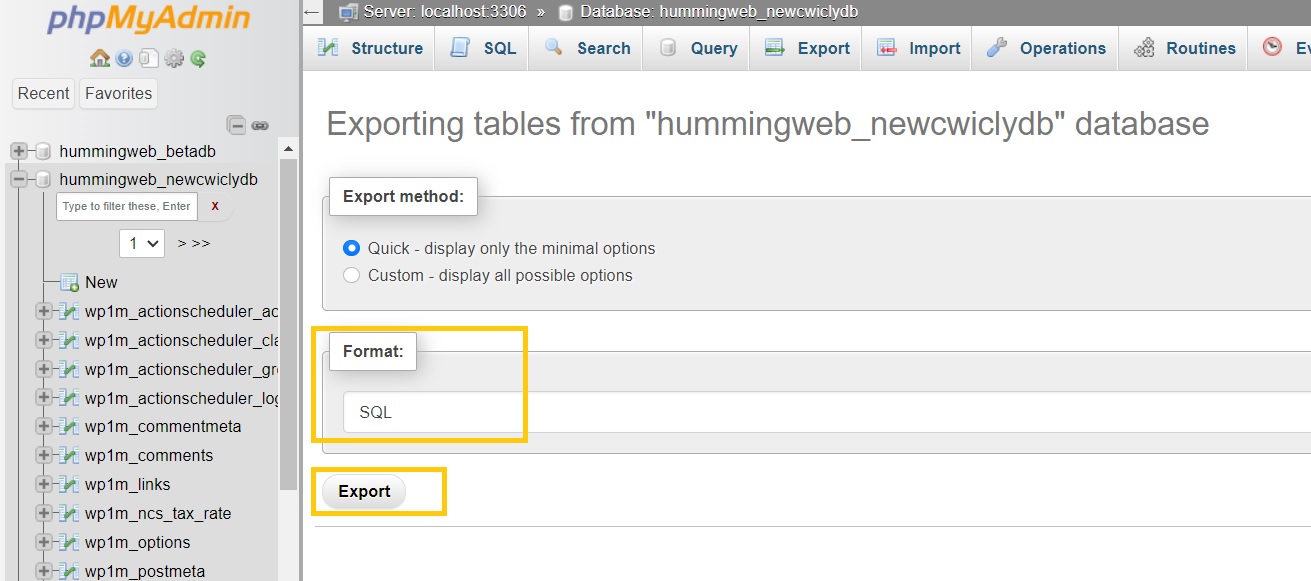
4. Create a new database in new server to migrate a WordPress site
On your new host where WordPress is to be migrated, create a new empty database through your hosting control panel or using a tool like phpMyAdmin.
a. Please give the name of the new database and save it.
b. Then create a user by giving a username and password and save it.
c. Then add that user to the database you just created.


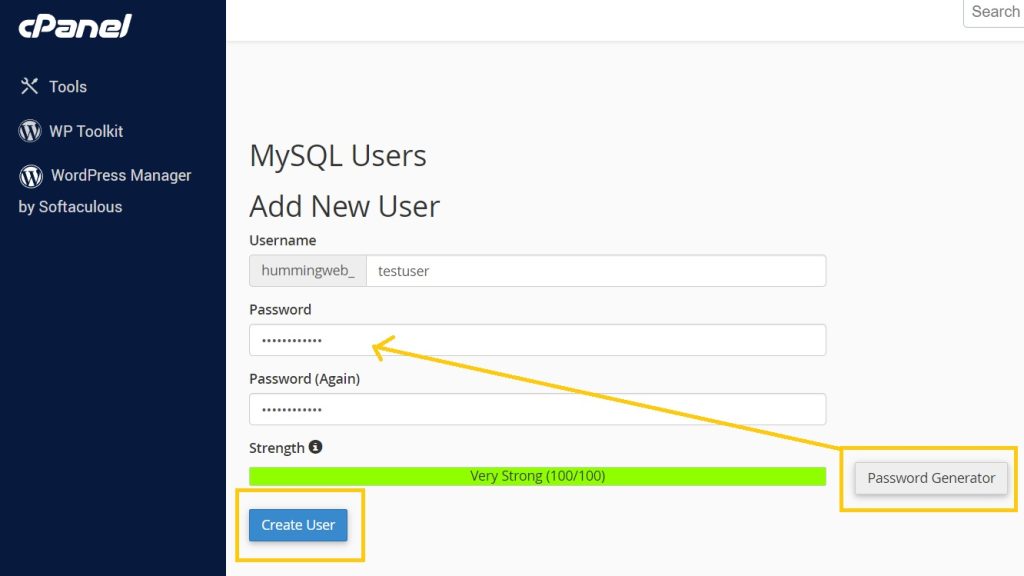

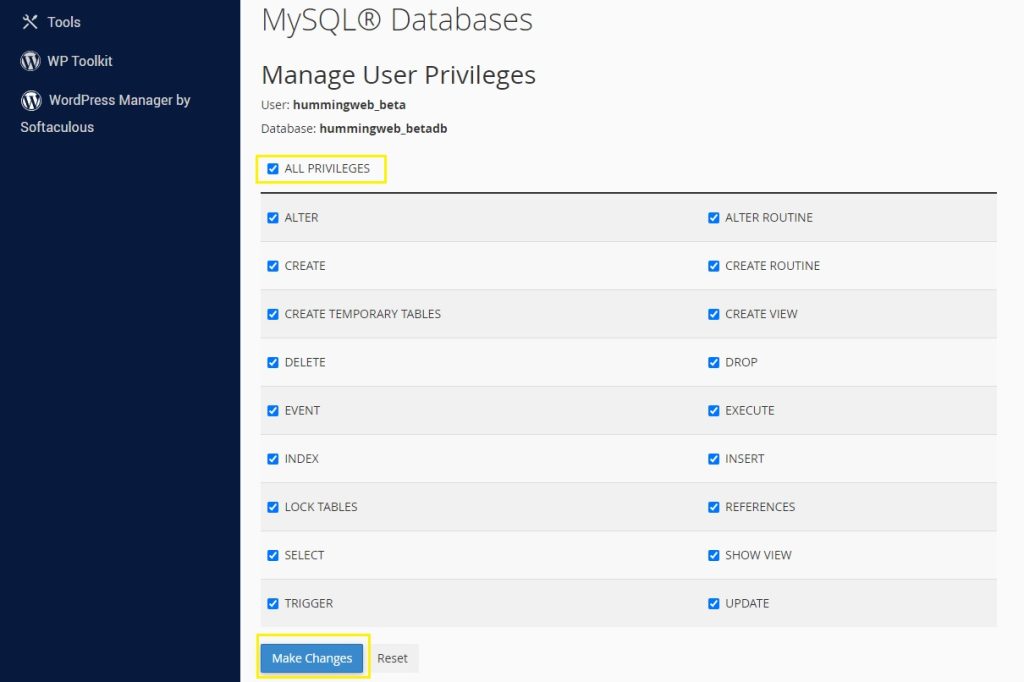
5. Import the database of the WordPress site manually
Access the new host database using phpMyAdmin or the equivalent tool. Select the empty database you created in the previous step and choose the “Import” option. Upload the SQL file exported in Step 3 and import it into the new database.

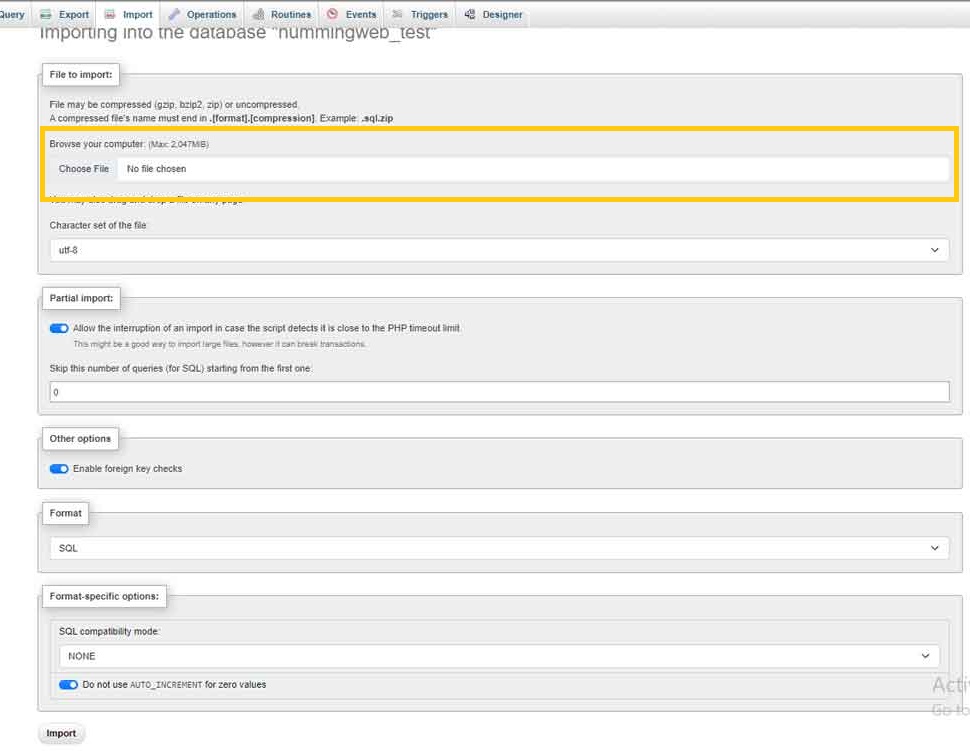
6. Configure the database connection manually
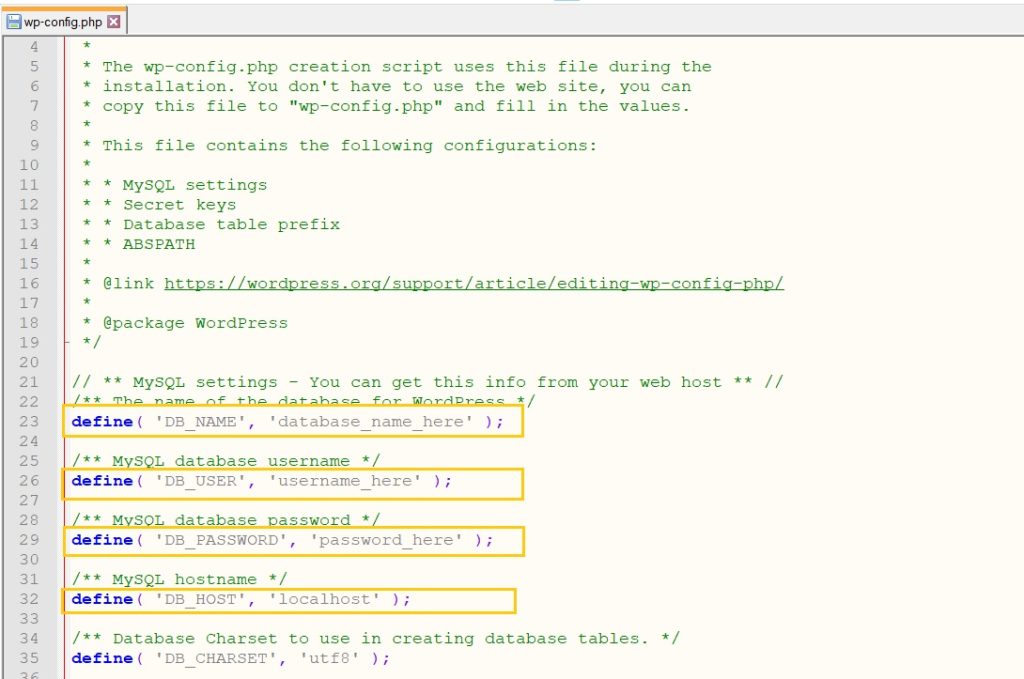
In the WordPress files you downloaded in Step 2, locate the wp-config.php file. Open it in a text editor and find the database connection settings. Update the database name, username, password, and hostname with the details of your new database. Save the changes.
7. Migrate your site files to a new host:
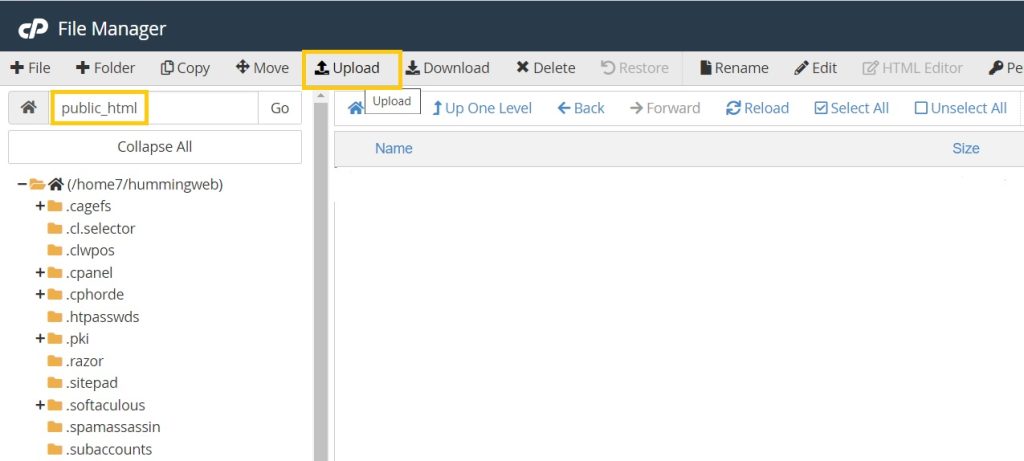
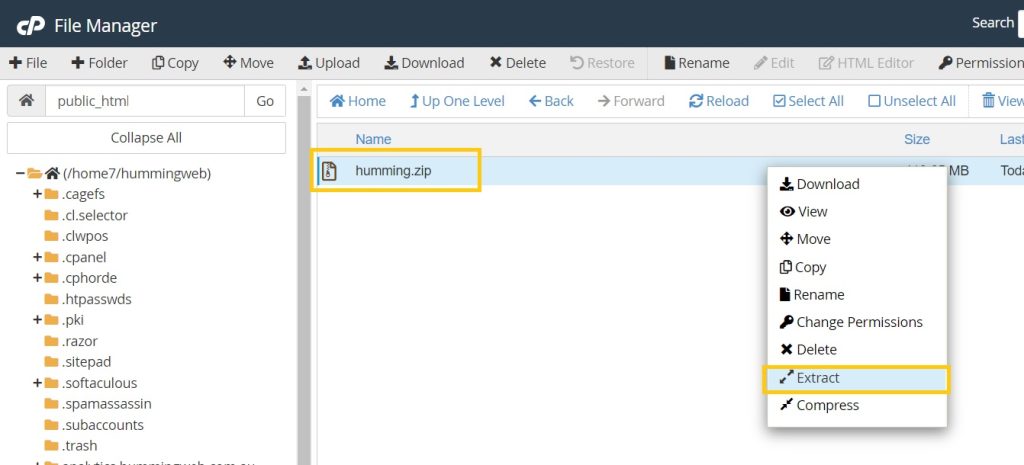
Connect to your new host using FTP or the file manager and navigate to the root directory of your WordPress installation. The root directory for installation would be the Public_html folder. Upload all the files you downloaded in Step 2 to the new host.

8. Update the site URL representing your website domain name:
Access your new WordPress installation by visiting the domain name or IP address in a web browser. Log in to the WordPress admin dashboard. Go to “Settings” > “General” and update the “WordPress Address (URL)” and “Site Address (URL)” fields to reflect the new domain or directory.
9. Test and finalize:
Browse through your new site using your domain name and check if everything is functioning correctly. Verify that all plugins, themes, and customizations are intact. For Plugin, go to the plugin section and check if any required plugin is disabled. In that case, you have to activate it. Test the functionality of forms, links, and any other features. Update any hardcoded links or references to the old site if necessary.
Once you have confirmed that the migration of the website to a new host is working correctly on the new web host, you can update your DNS settings to point your domain to the new host, making the migration fully live.
Remember, manual migration of a WordPress website to a new web host can be complex and time-consuming, so if you’re not confident in performing these steps yourself, it’s recommended to seek assistance from a WordPress professional or consider using a WordPress migration plugin or service to easily migrate.
Are you considering manual migration of the WordPress site from one host to another rather than using some plugin? Then contact us


