Google Tag Manager (GTM) is a powerful tool that allows you to measure and optimize your website’s performance, conversions, and user behavior. One of the most important metrics that you can track with GTM is purchases, which indicate how well your website is generating revenue and satisfying your customers. In this article, we will show you how to set up purchase tracking with GTM, using the Enhanced Ecommerce feature of Google Analytics. You will learn how to create and configure tags, triggers, and variables, as well as how to test and debug your purchase tracking implementation. By the end of this article, you will be able to track purchases on your website with GTM and gain valuable insights into your online business.
To set up this tracking, firstly you need to setup few things-
- Setting up GA4 on your website
- Base GA4 tag need to be installed on your website
- Setup and install Google Tag Manager need to be installed on your website
- Install all the [[Important]] plugins on your website for analytics
Please see the [[Data Layer in GTM]] before proceeding forward
Things needed on your website;
- Product page with all the product details
- Woo commerce or any plugins installed what will push the data
- Check out page
- Landing/ thank you page
If you are new to woo commerce do not forget to check the Track enhance e-commerce option in the settings

This will enable the woo commerce to push the data into the data layer which we can pull with the help of tag manager
In tag manager
after all the preparation has been completed, we will start by creating a tag which send data to Google Analytics 4
Creating Tags
- Go to Tag section
- Click on Tag Configuration
- Select the Google Analytics: GA4 Event
- Now choose the Base GA4 tag
- To give the event name you need to choose from the recommended events that google has provided us. or see Events in Google Tag Manager GTM
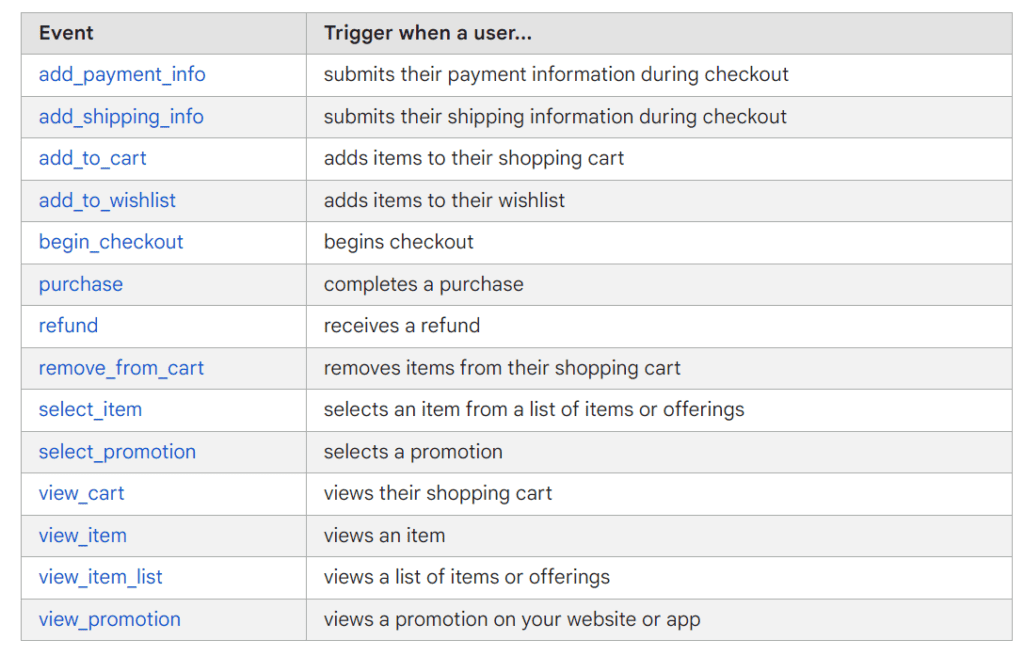
You need to put the event name exactly like the recommended event which is case-sensitive
In the User Property, you need to provide the value from the data layer


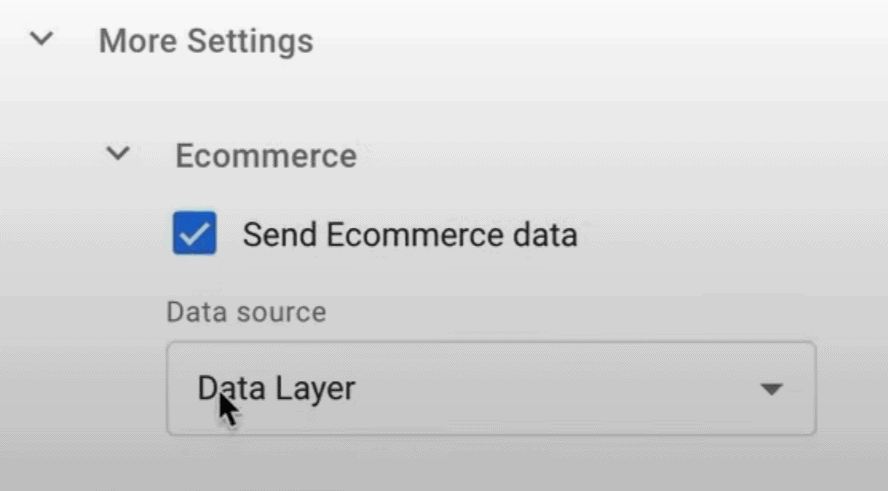
Now you need to go to More settings and click on Send Ecommerce Data
Creating Trigger
Now we need to build the trigger that will fire for the tag we created
- Click on the trigger section
- Select the plus(+) icon on the top right
- Now select the Custom event
- Put the event name as
purchase - Save
IMPORTANT
Now to create all the ecommerce events there is an easy way to do it which will track all the ecommerce events on your shopping page.
You need to go the same tag section from above
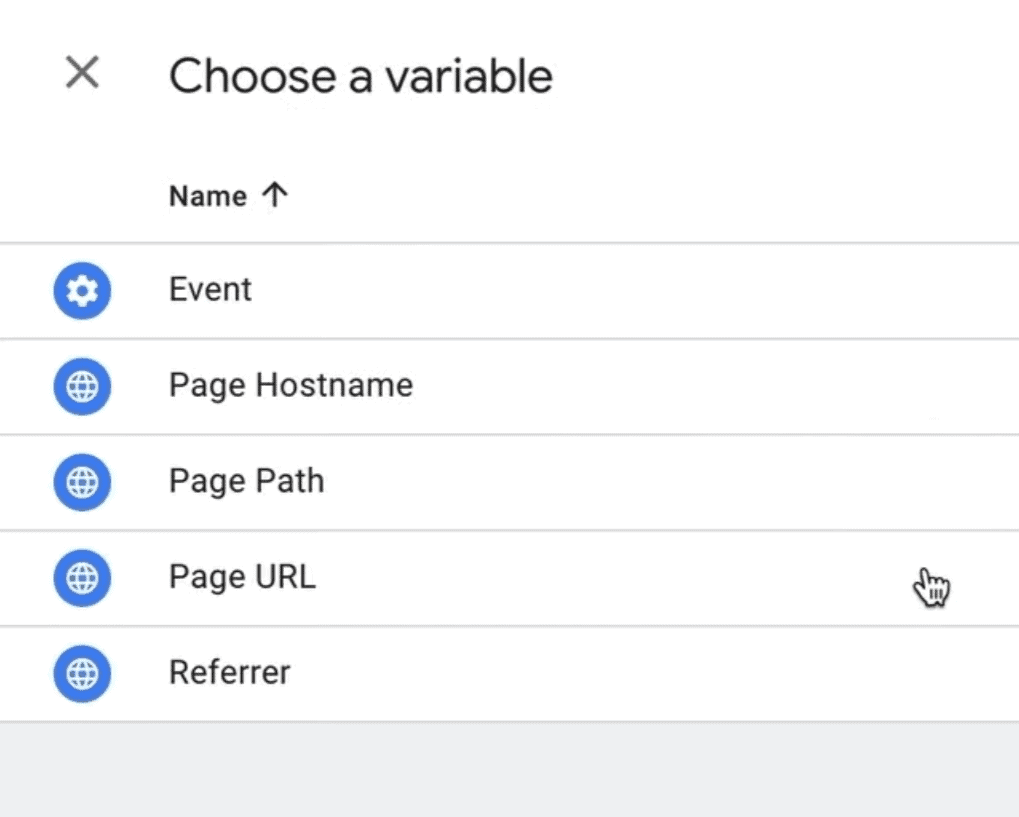
And change the event name with the built in variable
For that you need to remove the event name that you filled and select the option on the side of it
And the variable box will pop out and you need to choose the event option
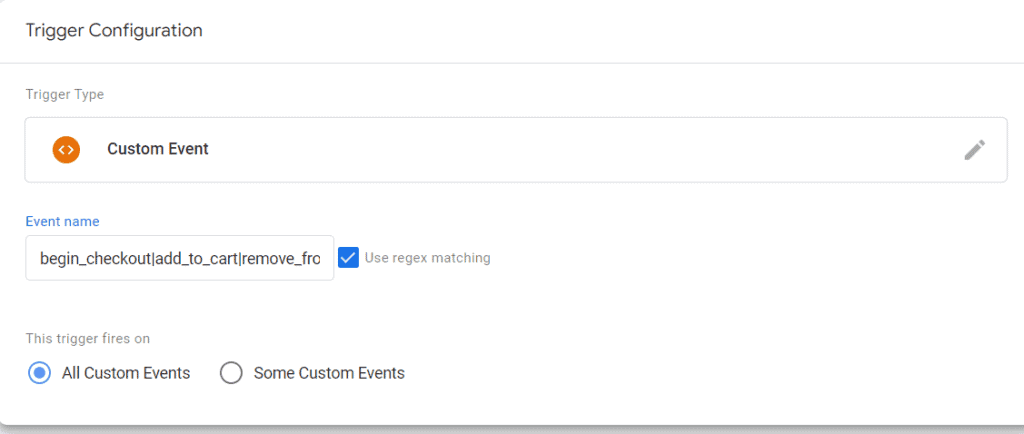
And now you need to change the trigger section to fire on all the ecommerce events
For that, you need to go to the same trigger that you made above
Now change the event name to:
begin_checkout|add_to_cart|remove_from_cart|view_item|select_item|view_item_list|select_promotion|view_promotion|purchaseNow copy and paste this on your event name and save
Do not forget to put name to your trigger and your tag
Preview And Publish:
After configuring the GA4 tag, use the “Preview” mode in GTM to test its functionality.
- Browse your website and confirm that the GA4 tag is firing correctly in the GTM preview mode.
- Once satisfied with the test results, hit “Submit” in GTM to publish the container changes.
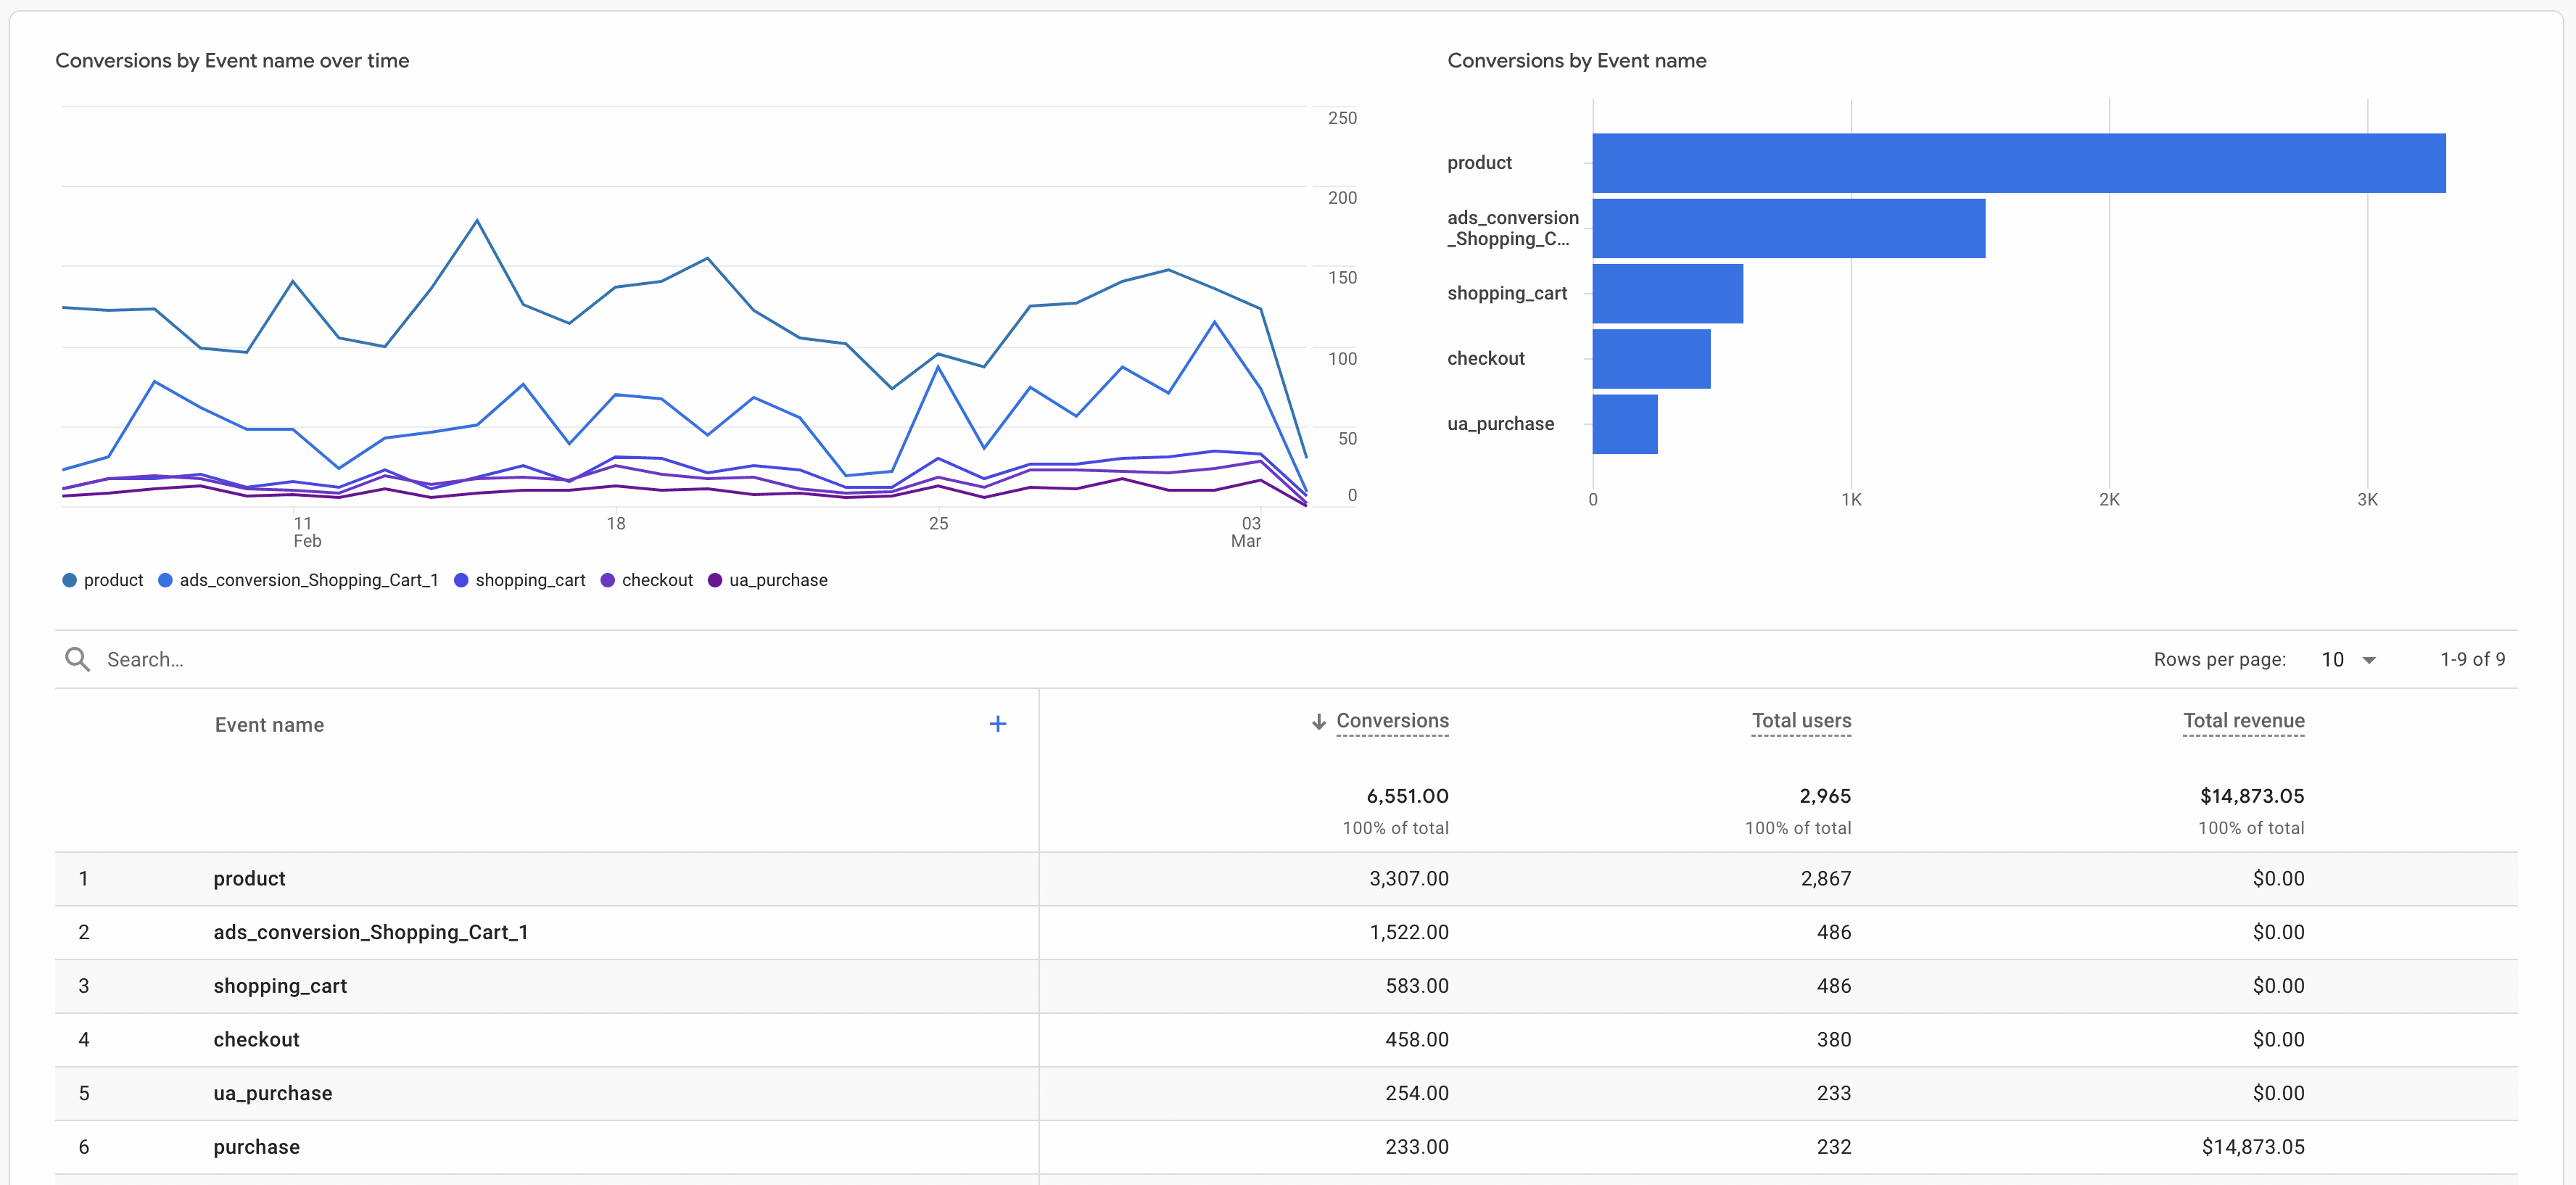
Conclusion
Tracking purchases with Google Tag Manager is a great way to measure and improve your website’s performance and revenue. By using the Enhanced Ecommerce feature of Google Analytics, you can collect and analyze data on your customers’ shopping behavior, such as product views, add to cart, checkout, and transactions. You can also use GTM to implement custom purchase tracking, such as tracking coupon codes, payment methods, or shipping options. With GTM, you have full control and flexibility over how you track purchases on your website, and you can easily update and modify your tags without coding. We hope this article has helped you understand how to set up purchase tracking with GTM and how to use the data to optimize your online business.
You can check the data in the debug view of Google Analytics 4 and it will take 24 to 48 hours to get processed in GA4

