Instagram Feeds & WordPress Page
Are you in search of a solution to seamlessly share your latest Instagram feeds or post on your WordPress venture?
Integrating recent Instagram content onto your website not only amplifies your brand exposure but can also drive additional traffic to your Instagram account. Moreover, these images serve to enhance the visual appeal and interactivity of your WordPress website.
In this comprehensive guide, we will lead you through the step-by-step procedure for automatically add Instagram recent posts on your WordPress post or WordPress Website.
Why embed Instagram photo on WordPress?
With over 1 billion monthly active users, Instagram stands as a prominent social media platform for sharing videos and images. Its algorithm facilitates the discovery of new user accounts based on user preferences.
For those who have an existing WordPress website and are venturing into Instagram, the opportunity to garner more followers becomes readily available by showcasing Instagram photos on their website. This practice contributes to building social proof, indicating an active presence on Instagram, fostering engagement with the audience, and extending the duration of visitors’ interaction with your site.
Given these advantages, let’s explore the seamless and automated process of posting Instagram feeds to WordPress using WordPress Plugin.
Step 1: Choosing and Installing the Plugin
- Navigate to Your WordPress Dashboard:
- Log in to your WordPress admin dashboard.
- Go to Plugins:
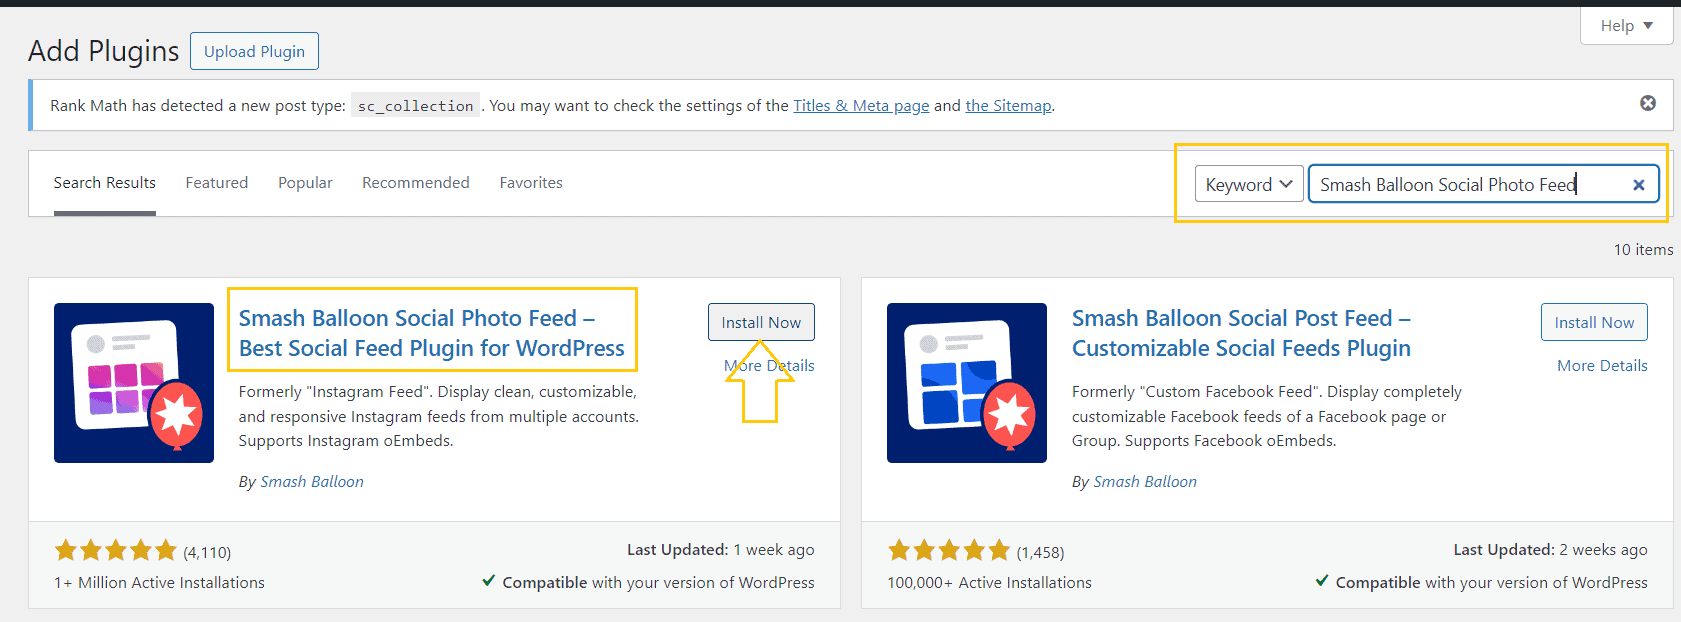
- In the left-hand menu, click on “Plugins” and then “Add New.”
- Search for the Plugin:
- In the search bar, type “Smash Balloon Social Photo Feed.”
- Install and Activate:
- Click “Install Now” next to the plugin, and after installation, click “Activate.”
Step 2: Configuring the Plugin Settings
- Locate the Plugin Settings:
- After activation, a new menu item, often labeled “Instagram Feed,” will appear in your WordPress dashboard. Click on it to access the plugin settings.
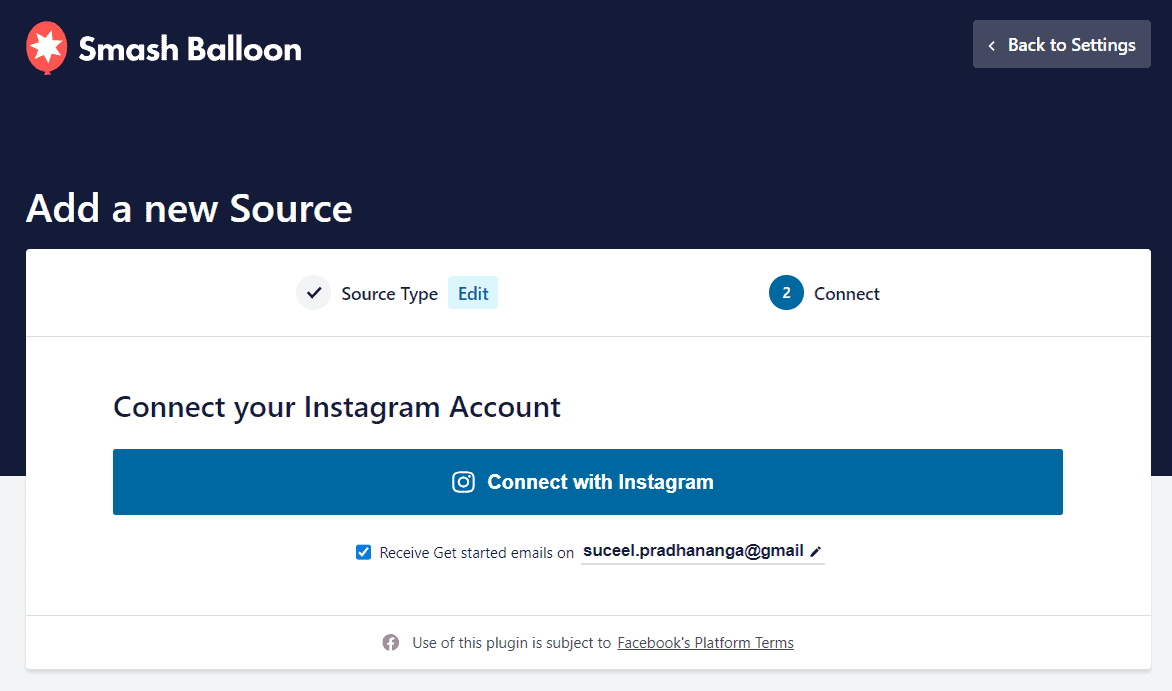
- Connect to Instagram:
- Inside the plugin settings, find the option to connect your Instagram account. Click on it and follow the prompts to authorize the plugin’s access to your Instagram photos. This may involve logging in to your Instagram account and granting permission.
- Generate Access Tokens (if necessary):
- Depending on the plugin, you might need to generate access tokens. For “Smash Balloon,” this is typically done through a link provided in the settings. Follow the link, generate the access token, and paste it back into the plugin settings.

Step 3: Display Settings and Customization
- Configure Display Options:
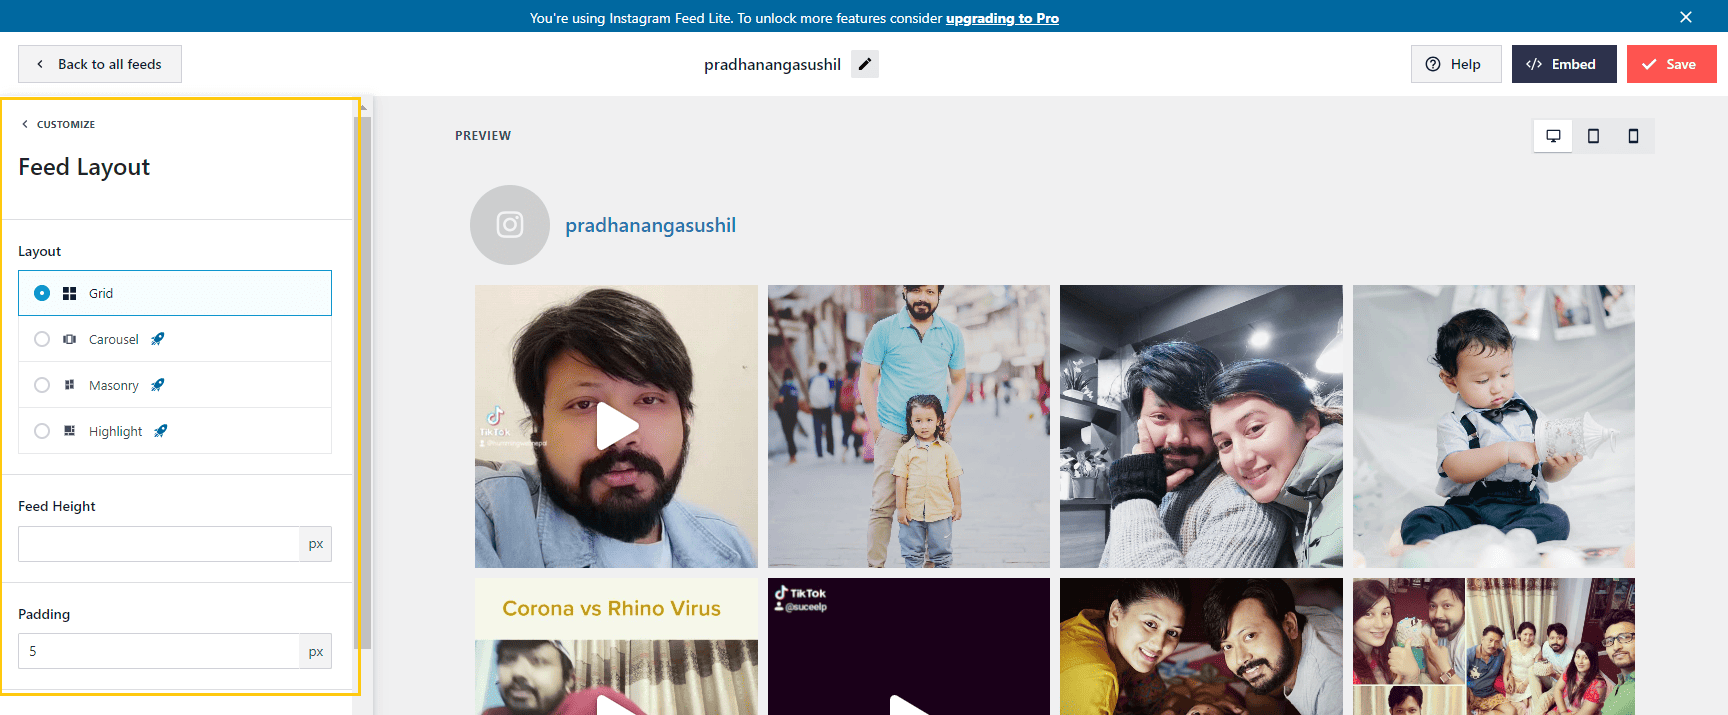
- Explore the plugin settings to customize how your Instagram feed will appear on your WordPress site. You can usually choose between a grid, carousel, or single images.
- Adjust Layout and Styling:
- Fine-tune the layout, styling, and other display parameters to ensure the Instagram feed seamlessly integrates with your website’s design. This might include adjusting colors, spacing, and the number of columns.
Step 4: Automating Posting
- Explore Automatic Posting Options:
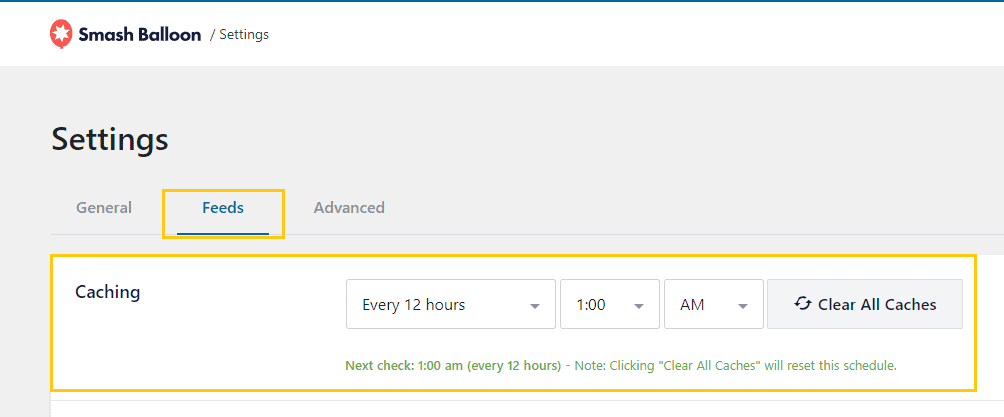
- In the plugin settings, look for features related to automatic posting. For example, “Smash Balloon” allows you to set automatic updates at regular intervals. You can configure how often the plugin checks for recent Instagram photos and updates your WordPress site accordingly.
Step 5: Fine-Tuning Post Parameters
- Customize Post Titles and Descriptions:
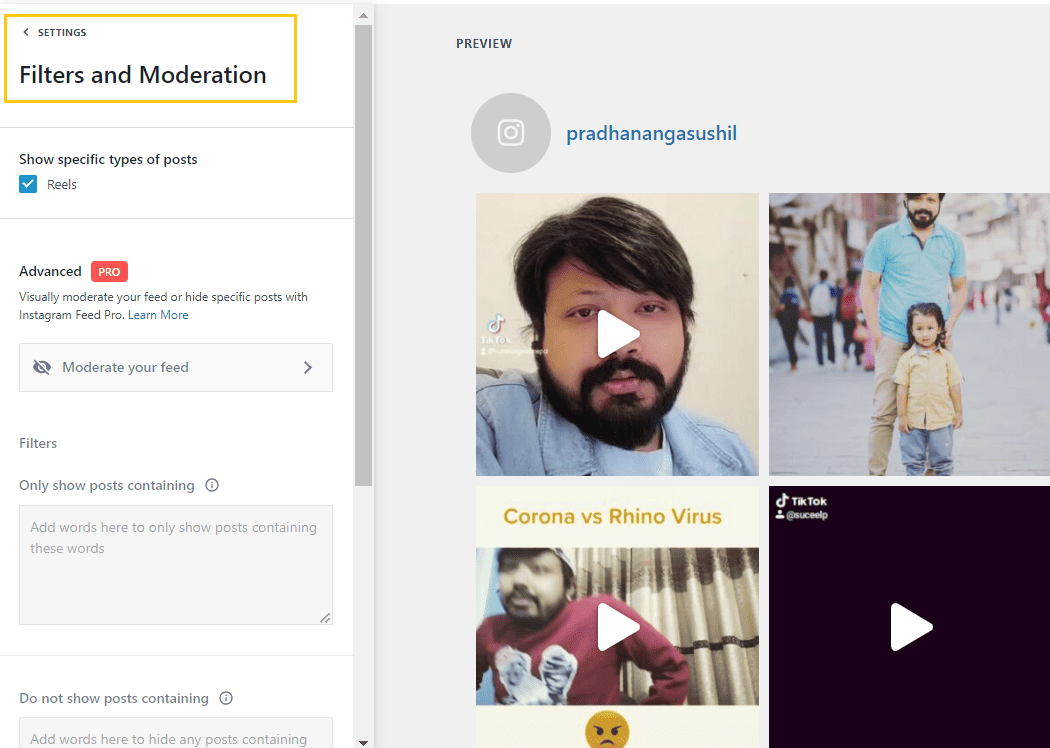
- Depending on the plugin, you may have options to customize the post titles, descriptions, and other parameters for the Instagram posts being imported. Adjust these settings to align with your website’s content strategy.
Step 6: Testing and Troubleshooting
- Upload New Photos to Instagram:
- Upload new photos to your Instagram account to test the automatic posting functionality.
- Check WordPress Site:
- Visit your WordPress site to ensure that the newly uploaded Instagram photos are automatically imported and displayed according to your configured settings.
- Troubleshoot if Necessary:
- If any issues arise, refer to the plugin’s documentation or support resources for troubleshooting assistance. Common issues might include connectivity problems or misconfigurations.
Step 7: Regular Monitoring and Updates
- Monitor Integration:
- Regularly check your WordPress site to ensure the Instagram integration is functioning as expected. This includes verifying that latest Instagram photos are being imported automatically.
- Update the Plugin:
- Keep an eye on plugin updates. When new versions are released, update the plugin to benefit from improvements, bug fixes, and enhanced compatibility.
Step 8: Considerations and Best Practices
- Copyright and Permissions:
- Always respect copyright laws. If you are using someone else’s Instagram content, ensure you have the necessary permissions.
- Quality and Relevance:
- Make sure that the Instagram posts/feeds you are importing align with your website’s content strategy and maintain a high level of quality.
- Performance Optimization:
- Optimize your WordPress site’s performance to handle the additional content. Consider strategies such as image compression and caching for an optimal user experience.
By following these steps with the “Smash Balloon Social Photo Feed” plugin as an example, you can seamlessly integrate your Instagram posts into your WordPress site, ensuring an automated and visually appealing content display for your audience. Always refer to the specific documentation provided by your chosen plugin for detailed and tailored instructions throughout the process.
INSTAGRAM FEED
If you encounter any issues or have specific requirements, feel free to provide more details,
and we can offer more tailored assistance.

