One of the most important parts of the Tag Manager setup is that without the data layer, we won’t be able to track clicks, submissions, and other triggers
The data layer is always between the website and the tag manager which provides data from the website to the tag manager and the tag manager will send the data to the analytics tools. the data layer is a JavaScript object that enables GTM and gtag.js to pass information to tags. You can use the data layer to track events or variables, and set up triggers based on their values. In this article, we will explain what the data layer is, how it works, and how to use it effectively with GTM. You will learn how to create and configure data layer variables, how to add data layer code to your web page, and how to use the data layer to pass data between pages. By the end of this article, you will be able to use the data layer to enhance your GTM implementation and gain valuable insights into your website.
Please see the Google Analytics/Tag Manager support document for more information
Unless the developer has made a custom data layer in the website
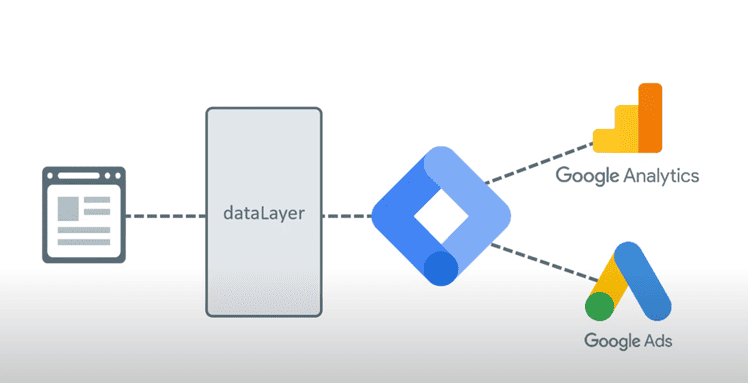
To get the data, the data should appear in the data layer of the website
Adding the data layer
(Who can send the data)
1. Developers
2. Website plugins (such as google tag manager for WordPress)
3. Google tag manager listeners (such as link click triggers)
4. Custom JavaScript
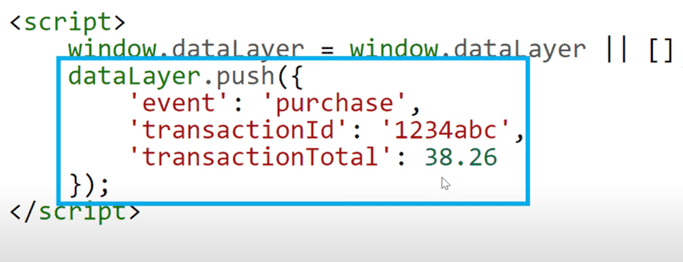
Sometimes if you use the official Google Doc in your code then sometimes it will work because it has to be installed above the Google Tag Manager snippet but most of the time the developer forgets to put the code
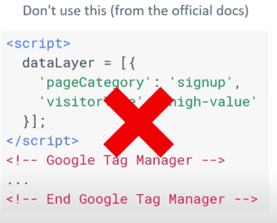
Where to push the code?
If you want the data to show before the page has been loaded, then you need to push the code before the Google Tag Manager snippet
But
If you don’t care to show the data layer before or after the page is loaded then, you can push the data layer anywhere in the code before or after, the only thing important is to push when the data has been pushed or when the user click the button
To see the data layer you can go to;
1. Go to Preview Mode in the Tag manager
2. Click on any message on the left side is a data layer push
3. If you click on the message, you can see the data layer
4. Click on the message
5. Click on Data Layer which shows all the data contained on that page
If you want to check the individual page, then you need to;
1. Preview Page of GTM
2. Check the left side which shows the name of the page
3. Now you can see all the events that fired on the page and their data
When you reload the page, the data layer is also reset
you can check what data has been pushed in the preview mode in the GTM
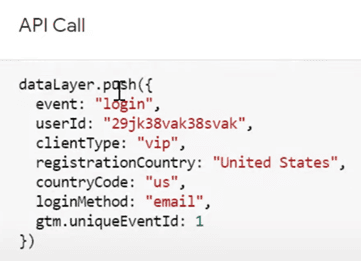
So now, we need to send the data to Google Analytics
Creating Tags
To send the data to the analytics, we need to create a tag in GTM
To create a tag in Google Tag Manager, we need to;
1. Go to Tags
2. Click on NEW
3. In Tag Type, we need to choose Google Analytics: GA4 Event
4. And configuration tag, Choose the Base Code
5. We can put any name related to data you can track such as login
6. And in Event Parameters, we need to choose variables
But in GTM all the data are in the data layer, so we need to push the data from the data layer to the variables.
Creating Custom Variable
In order to create a custom variable we need to;
- Go to Variable in GTM
- Click on ‘+’ icon
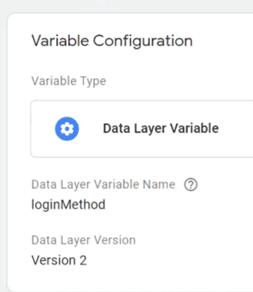
- In variable configuration, we need to click on Data layer variable
- Now give the variable name from the data layer
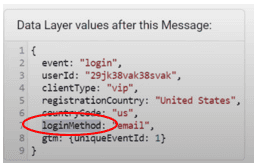
- In our case the name of the data layer is loginMethod
- Name of the data layer are case sensitive and need to be exact
- Now click on Save
- Now in the Value section choose the variable that we made
The custom data layer variable is always donated by ‘{{ }}’
- Now make a Parameter Name which will send to Google analytics

CreatingTrigger
To create a trigger, we need to;
1. Go to Trigger in the GTM
2. Click on ‘+’ icon
3. Click on Trigger Configuration
4. Now we need to use the Custom Event because we don’t have any default trigger to track the user engagement such as login
Custom trigger is the trigger where you can give any event name to trigger on the left side of the preview mode
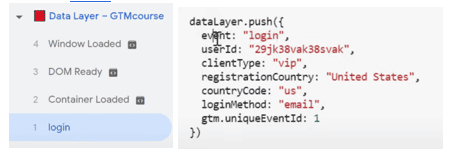
5. Save
So now every time the event name Login appears on the data layer, the trigger fires
Preview And Publish:
After configuring the GA4 tag, use the “Preview” mode in GTM to test its functionality.
- Browse your website and confirm that the GA4 tag is firing correctly in the GTM preview mode.
- Once satisfied with the test results, hit “Submit” in GTM to publish the container changes.
Mistakes in the data layer
Trying to push the data layer variable when the data has not been pushed yet
- Like when you want some user ID data, but you pushed the data layer before the User data has been loaded
- Having data layer= [] code is below the GTM container
It is better to use the data layer push method
- Case Sensitive
All the custom even names and variables need to be sensitive and need to be exact
Conclusion
The data layer is a JavaScript object that enables Google Tag Manager and gtag.js to pass information to tags. You can use the data layer to track events or variables, and set up triggers based on their values. The data layer also helps you organize and access your data consistently and predictably, rather than relying on scattered signals on your page. To use the data layer, you need to create and configure data layer variables and add data layer code to your web page. You can also use the data layer to pass data between pages if you need to persist the values through multiple page views. The data layer is a powerful and flexible tool that can help you measure and optimize your website’s performance, conversions, and user behaviour.
You can check the data in the debug view of Google Analytics 4 and it will take 24 to 48 hours to get processed in GA4

